⚠️ Airstream Owners: Replace THIS Part Before It FAILS!
- Rick & Lisa Wright

- Sep 21, 2025
- 3 min read
Water leaks are the silent killer of Airstreams. We’ve learned this the hard way. If you’ve been following our YouTube channel, you may remember when we discovered a major leak that caused extensive damage to our rig. It was both costly and time-consuming to repair—something no Airstream owner ever wants to experience.
But here’s the good news: a simple DIY upgrade can help prevent one of the most common sources of water leaks and save you thousands in repairs down the road.

The Problem: Leaks Hiding In Plain Sight
On our recent trip to the Great Lakes, I noticed water dripping from underneath the Airstream. At first, I assumed it was just condensation from the AC line. But after a closer look, I realized the water was actually coming from inside the coach—a much bigger concern.

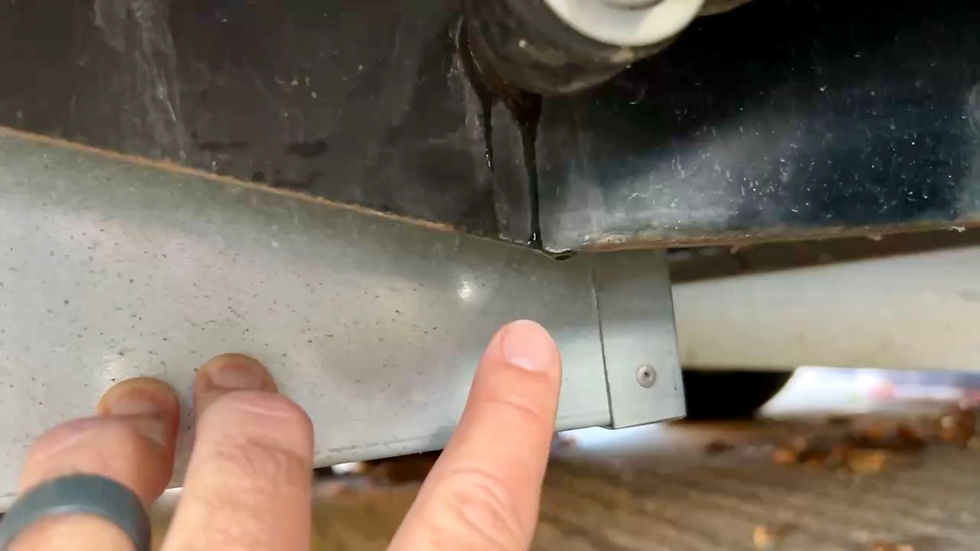
After tracing the source, the culprit was obvious: the OEM city water inlet valve. The factory-installed plastic component had started to fail, creating a slow drip.
"Water Leaks are the Silent Killer of Airstreams"
It wasn’t a major gusher, but that’s the thing about leaks—small drips add up over time and can quietly destroy your floors, furniture, and substructure.
That’s not meant to scare you, but to remind you to stay vigilant. Regular inspections for water intrusion are one of the best habits you can develop as an Airstream owner.
The Hidden Cost of Water Damage:
When water damage does occur, the repair process can be overwhelming. In our case, the leak damaged the subfloor, forcing us to:
Remove much of the living room furniture
Cut out and replace sections of the wood subfloor
Install all-new vinyl flooring throughout the coach


Even though I handled the repairs myself, it still cost a significant amount of money and countless hours of labor.
If you want to see the entire repair process, we documented it from start to finish in our Airstream Leak Repair Video Playlist. 👈

The Simple, Preventive Upgrade:
Thankfully, this time we caught the problem early and avoided major damage. But it raised an important question: why wait for a known weak point to fail?
If you already know a factory-installed part is prone to leaks, it makes sense to replace it before it has a chance to cause damage.
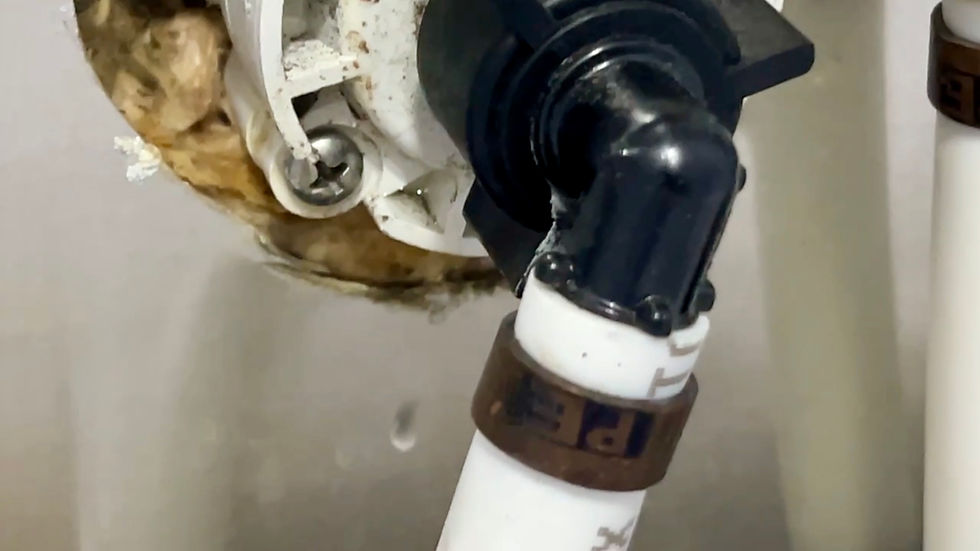
That’s why we swapped out the OEM plastic city water inlet for the Airkrafters nLET©.

This aftermarket part is a durable, smart alternative that eliminates the failure-prone plastic design. Better yet, it only takes about 30 minutes to install. For such a small investment of time, you get peace of mind knowing your Airstream is better protected against costly water damage.
Final Thoughts:
Water leaks are inevitable in Airstreams—it’s just part of RV life. But by making a few smart upgrades, you can significantly reduce your risk of serious damage.
The Airkrafters nLET© is one of those simple, preventive fixes that can save you thousands in the long run.
Sometimes the best repair is prevention. And in this case, prevention takes less than an hour and could be the cheapest insurance policy you’ll ever buy for your Airstream.
Happy Camping & Safe Travels
Rick & Lisa


Comments